Create a Shipment in Automated Product Release
Last updated: April 30, 2026
Overview
This guide walks you through creating a new shipment in Temperature Release, connecting it to an existing Lane Profile, Product Profile, configuring shipment details, and uploading temperature data.
Step 1: Navigate to Auto Product Release
Click the “+” (Plus) icon to create a new shipment.
Step 2: Enter Shipment Details
Create a Shipment ID
Enter a unique Shipment ID for tracking purposes.
Connect to a Lane Profile
Select the appropriate Lane Profile from the dropdown.
Once selected, the system will automatically populate:
Configured parameters
Monitoring rules
Associated tags
Risk settings
💡 Tip: Make sure your Lane Profile is created beforehand under*
Configuration → Lane Profile.
Step 3: Set the Shipment Timeline
Enter the Start Date.
Click Apply.
Enter the End Date.
Click Apply again.
Click Continue.
⚠ Always click Apply after selecting dates to ensure they save properly.
Step 4: (Optional) Add Advanced Details
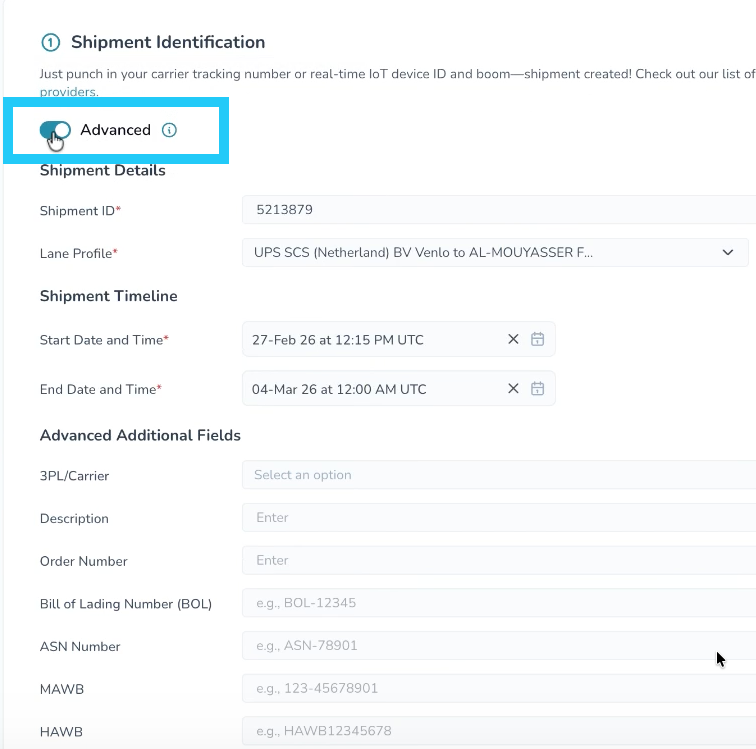
Click Advanced to expand additional fields.
Here you may add:
Carrier name
Bill of Lading (BOL)
Marine vessel number
Flight number
Additional shipment identifiers
Descriptions or notes
These fields are optional but helpful for traceability and documentation.
Step 5: Apply a Product Profile (If Applicable)
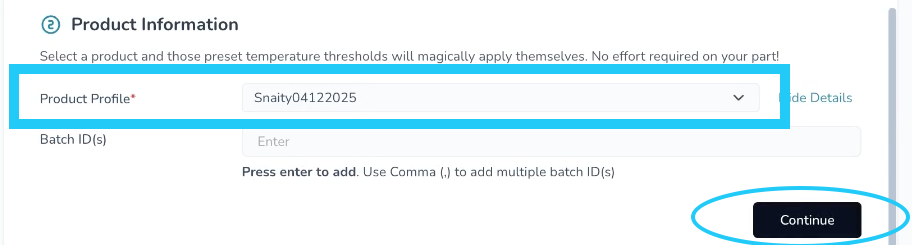
Select a Product Profile.
The system will populate the product-specific temperature parameters.
Product Profiles must be created in advance under:
Configuration → Product Profile
💡 Best Practice:
Create your Lane Profile and Product Profile first to avoid manual data entry later.
Step 6: Review and Manage Tags
Tags associated with the selected Lane or Product Profile will auto-populate.
To add new tags:
Click Edit
Click the “+” icon
Search and select the desired tag
Save
Tags help with filtering and reporting later.
Step 7: Review Shipment Before Creating
Click Review.
Carefully verify:
Shipment ID
Lane Profile
Timeline
Carrier details
Product Profile
Tags
If everything looks correct, click Create New Shipment.
Step 8: Upload Temperature Data
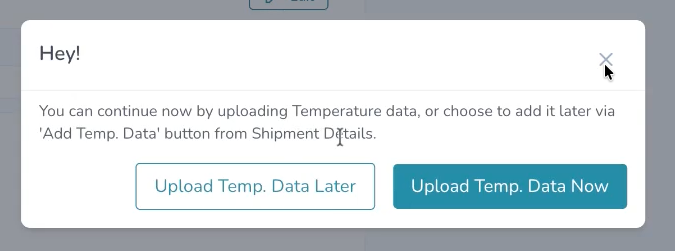
After creating the shipment, you will see the option to:
Upload temperature data now
ORUpload later using the Add Temp Data button from Shipment Details
Step 9: Add Temperature Data (When Ready)
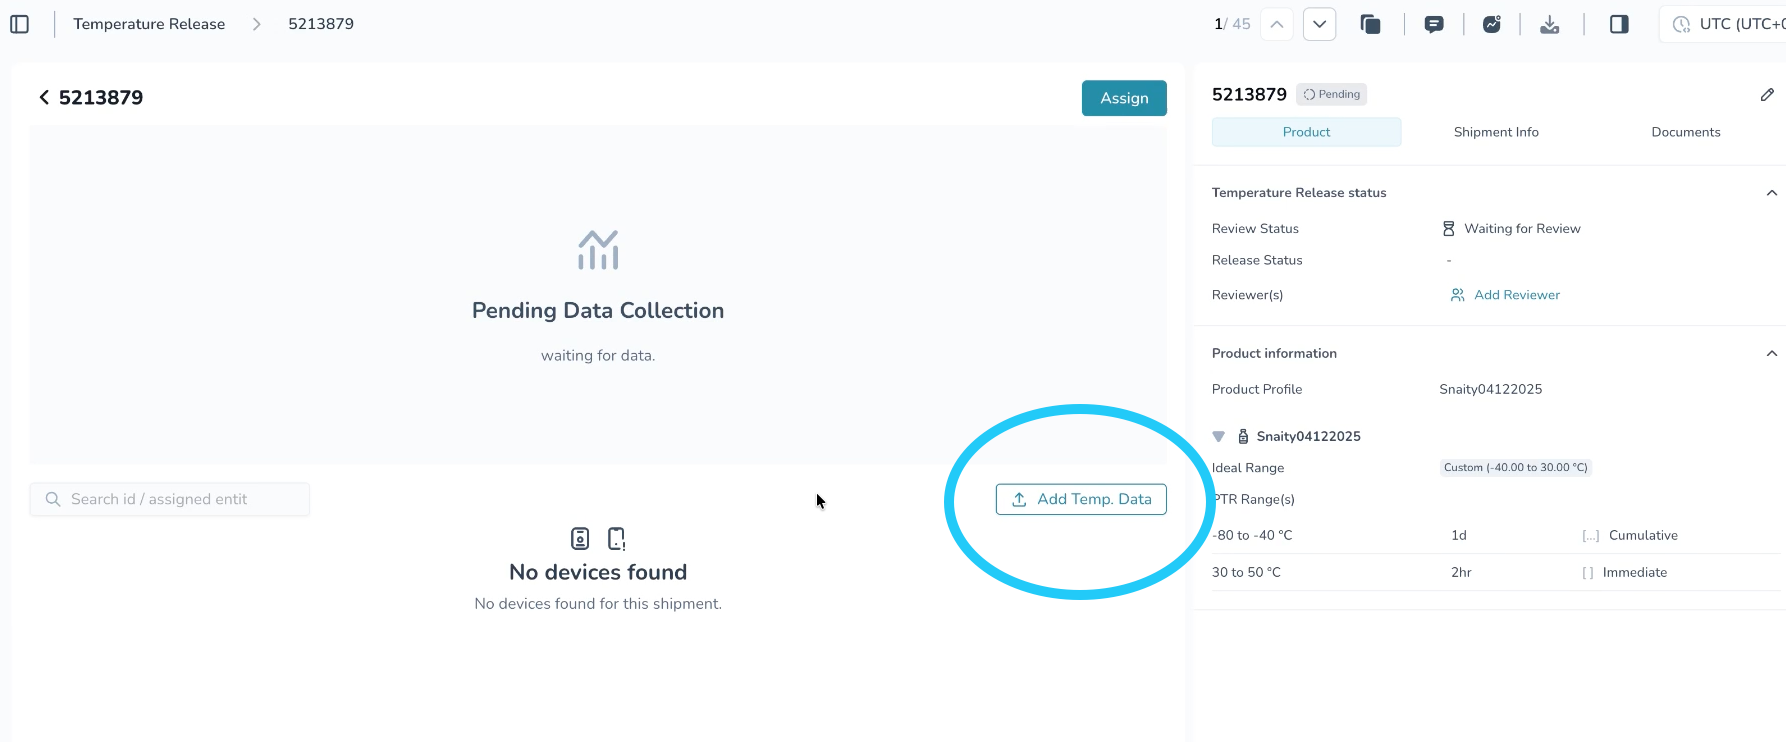
From Shipment Details, click Add Temp Data.
You may:
Upload logger files
Upload temperature data only
Upload PDFs (no temperature data)
Manually enter excursions or deviations
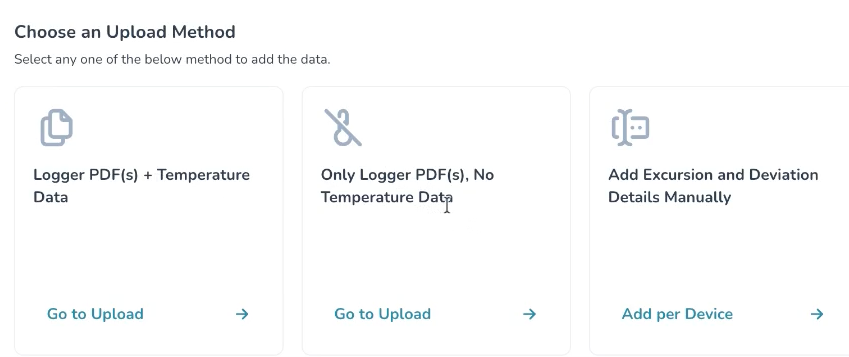
Manual Entry Process:
Select the device
Enter excursion details line by line
If managing multiple devices, repeat per device
Click Advanced to expand additional fields if needed
Best Practices
Always create Lane Profiles and Product Profiles before creating shipments. This will make your life easier!
Use tags consistently for easier reporting and search.
Double-check timelines to avoid evaluation issues.
Review shipment configuration before final creation.